RUG HOOKING BLOG

About Me

My photo
I'm a mother of four grandmother of seven and great grandmother of three. I live with my husband in the house that we built with the help of my brothers and will have been married for 57 years this February.
Showing posts with label marrying wool. Show all posts

Sunday, March 26, 2023

GETTING THINGS READY TO HOOK MY NEXT RUG

 This post is more like a tutorial on how I go about dying wool that I have on hand. I know that seasoned teachers and rug hookers will be bored with this post but if it can help even one person who would like to try dying wool without having to use dye, it will be worth it to me. The only dye I used was green for the whole project. You can marry wool of different colors for amazing results but for this project, I use colors that are similar.

First thing, I searched the public domain for a picture for my next rug and took a photo of it and put it in a file on my computer, and printed it. I printed it in black and white because I can't get the Epson printer to print in color since it was moved but at least, I have the color photo on my phone, so no problem.


I trace the photo on a  see-through mylar sheet. I cut out a hole at the bottom of a cardboard box and tape the traced picture inside the box. I then tape a large sheet of paper on the wall to trace the image onto the sheet of paper the size I want. I have to wait until it's dark enough so the picture can be traced onto the paper. I turn on the light on my cell phone and prop it into a cup. The light is bright enough to reflect the image on the wall when the lights are dimmed. It takes a little while to set this up so it's where you want the image to be. It sounds complicated but it's not.

I tape the drawn pattern on a window during the day and then tape my backing over the pattern. I then traced the pattern onto my backing. My husband is supposed to rig up a tracing table for me and it will be so much easier on my injured shoulder to trace the pattern onto the backing as I have difficulty raising my arm. 


I covered about a handful of dry onion skin with water and boiled it for about 20 minutes. The used onion skins were drained through a fine strainer and the dye was collected in a jar. 

I use onion skins to make dye for the flesh colors. I can make different shades by controlling the amount of dye solution I use. When I have the desired shade, I remove some of the wool and leave some pieces a little longer if I need more shades. I use citric acid as a mordant to get flesh color. If you use, alum or aluminum it will turn the wool bright yellow. 


Here is the onion skin dye solution. What wasn't used has been labeled and put in the freezer for later use. 


I put natural-white wool in a little bit of Palmolive dish soap to soak overnight and added a bit of onion skin dye solution in the water then added the wool and gently simmered it until I got the desired shade and removed the wool and put it in a bowl.


This is what color was left in the pot.  At this point, I could have put some more presoaked white wool to get a lighter shade but I didn't have any left so I dumped the dye out.


I refilled the pot with clear very hot water and added 1/8 teaspoon of citric acid as a mordant in the water and stirred then dumped the hot wool in and immediately submerged the wool and stirred to get an even color.  I gently simmered the wool for about 20 minutes.

 I dumped the content in the sink until the wool was cooled enough to handle and I rinsed it well, taking care not to let the wool get a sudden change of temperature so as not to shock the wool.


This photo was taken at night in poor lighting and the color is not as it shows.

Here, I'm marrying some different shades of blue without adding any dye. I forgot to take a photo before adding the wool to the pot. I had some dark, medium, light, and very light wool of different shades and added some Palmolive dish soap to leach the colors into the water and gently simmered the wool until it was pretty well all the same shade and I removed the wool into a metal bowl and added 1/8 tsp citric acid to the water and stirred and added the hot wool back into the hot water and gently simmered for about 20 minutes and rinsed well, etc. 


This is the blue I got. It's not as bright as this. I had difficulty showing the true color for some reason.


I forgot to take a picture of the wool I used for the dark brown but this is a representation of the colors I used.


I married the assorted brown and white wool together by simmering gently.


The wool was taken out of the pot and I added 1/8 teaspoon of citric acid in the brown water and dumped the wool back in and removed it right away back into the bowl and added another 1/4 teaspoon of citric acid and put it back on a gentle simmer for 20 minutes as I wanted an uneven dark color for the hair.  I was very pleased with how well the color worked. I rinsed the wool well of course.

This is what I got for the flesh, the head covering, and the dark hair.


I used assorted pieces of yellow from other rug projects and added some white wool to the mix as I wanted a very pale yellow for the halos.

Married assorted yellow wool until an even color. The wool always looks darker when wet.


 Pale yellow wool pieces drying on a cord in my dying kitchen.  I always like to use whatever wool I have available from my stash if I can get away with it. 


A sample of the red colors I used because I forgot to take a picture before marrying it. 


This is the result of marrying all the red for Mary's dress. 


I used grey wool from a skirt and simmered it in soapy water and changed the water three times as I wanted the wool to be green somewhat, and I added some Cushing Dark Green acid dye until I got the shade I was looking for. It was night time and the lighting was bad but it turned pretty much like what I was hoping for. I found out it took a long time to bleed the dye from gray wool. I'm pleased with how it turned out. I prefer dyeing wool during the day so I can see the colors better. My eyes are not very good anymore.


This is a darker gray wool skirt that I have had for quite some time. I want to use what I have for the background and I didn't want a harsh black background.  This will do just fine.


I'm presoaking assorted light brown wool with some white for baby Jesus' garment.

I have only a few other small details to dye and I'll have all my wool ready. 

It still feels like winter as we had another snowy day today and yesterday. I'm starting to get worried about flooding this year since we are getting so much precipitation.

Thanks for stopping by for a visit and for leaving a comment. If you comment on my blog I usually reciprocate, it's only fair and I really appreciate your comments, however short. 


Sunday, August 9, 2015

WHERE TO BEGIN?

I always find when I haven't posted in a long time, it's difficult to know what to blog about because so much has been going on.

Each day is different and brings it's own gift. Flowers have bloomed and gone and some other have their turn doing their magic, family members come and go, calves are born, the farm is a busy place, haying is still going on between rain drops and I'm busy on a continual basis.

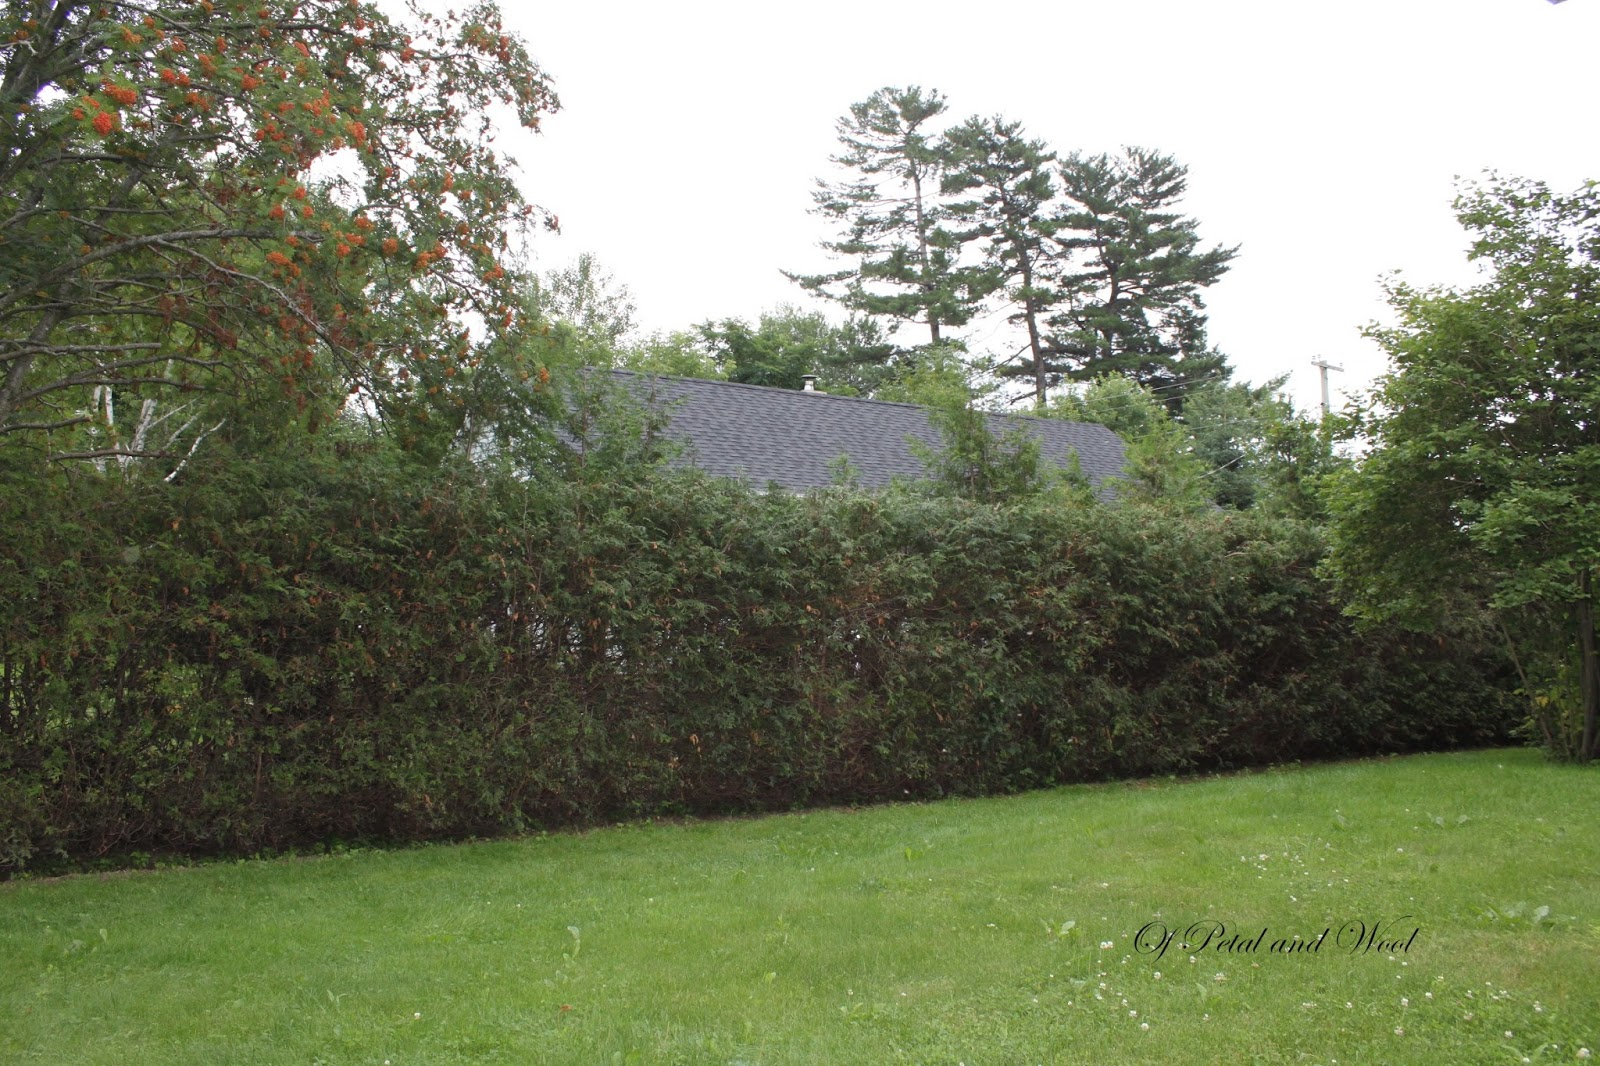
My biggest summer project was cutting the very tall and neglected cedar hedge. It was so tall that I couldn't see the neighbour's house when I was in the backyard and was creating shade on my neighbour blueberry bushes and the morning sun on my side. It was also so wide that it was taking too much space on both sides. Last winter had dumped tonnes of snow and it really damaged the hedge even more. I considered having it removed and replaced with a fence.

My husband has always been the one to clip the hedge with a hedge trimmer. It wasn't trimmed enough and the branches grew wider and higher over the years. It has become a challenge for my husband to look after it and so I thought I could give it a try. At first I trimmed only what I could reach from the ground with a small hand pruner, one branch at a time.  Then I got up on a 4 ft. ladder. I used my long handle pruner and also my ratchet anvil with extendable handles. The only thing was that to clip way in the middle on top was very heavy work. Holding that heavy anvil at or above my shoulders for a long time  was difficult with a sore shoulder but I worked till I was too tired and moved to an easier area and would return to the heavy work when my muscles were ready, doing a bit every day.


This is a photo showing how wide the branches are reaching especially near the arbor. Sorry, the photo looks washed out because it was taken on a sunny day. On the left, you can see how high the back deck is...

This photo was taken from my deck in the back. The deck is quite high from the ground. The hedge was so high, I could barely see the neighbour's roof even after cutting some tops on my side of the hedge.


Some of the ladders I was using. The taller one was very heavy but too much at an angle so I couldn't reach deep on the top. I used a small rake to pull the branches in order to cut them and retrieve the cut branches and a long stick to guide me for the height.


My neighbour Ardith is two years older than me wanted to help while I was working at the farm but it proved too heavy work for her. She can lift heavy and her legs are strong but her upper body strength wasn't strong enough so she helped with the clean up, she handed me the tools and steadied the ladder when needed.

 It saved me for running down the ladder constantly to get the right tool. We laughed and joked and had a great time working together. It surely made the task much lighter. Thanks Ardith. Seeing Ardith on the ladder gives you a perspective how high the hedge was.  That stick to the left is 8 feet hight.


This photo shows the tops I couldn't reach  way in the middle of the hedge with the two ladders and my long tools. George came to help cut a few impossible to reach branches and got an asthma attack and had to give up. The heat and humidity has been so high lately.


Here is the finished hedge at long last...
Canadian Tires had a sale on ladders and I bought a 6 ft. fibreglass yellow ladder (not shown) and I could reach much better to cut those impossible branches. Too bad I didn't had that ladder when I first started. It was so much easier to work with... but I'll have it for next time...

 George made me a long tool to reach and pull branches with a rebar that he bent the end in a hook. Worked like a charm.  So here is the hedge all finished cutting. Can you believe I cut off  about three feet on each side. The hedge is still a tall and wide hedge but now the sun can go right through so some new growth is possible hopefully.


Just a sea of blooms to keep me happy


And more blooms.


Here my winning from Ripplespeak blog.  Jennifer is a landscape artist and such an artful  poet full of wisdom that she make into Zines and she always send my soul soaring with her poems. This is my second time winning one of her arts which she sells on her etsy shop. Thanks so much Jennifer and so sorry in being late in acknowledging your thoughtful gift. You're the best...


Winning once is lucky but  winnings two giveaway in a row is very lucky. I bought a loto ticket but didn't win, hehe... I won this lovely wool  Paisley broach made by Lauren of Pugs and Rugs  and it's my third winning from Lauren. She makes silver spoons and forks jewellery. She is so generous with her give aways.  Look at how much she had to pay to mail that pendant to Canada. Thanks Lauren. You're the best too.


I married some wool with a small piece of dark brown wool and  I didn't stir the wool when I applied the vinegar and got this beautiful marble effect.


This is the abstract rug I've been working on and using lots of wool worms left over from my grandfather rug and dome dyed wool. This rug was inspired by a rug from Saundra L. Brown called Sycamore but it doesn't even holds a candle to hers. This is my way to relax at night. It would help if I dip dyed some wool in gradation like she used in her rug. I'm wondering what it will look like when it's done. There's no planning in this one.

What I'm planning to do is attacking the back cedar hedge next and Ardith wants to help again. There's a garden on both side of the hedge so it may be a big challenge again but I'm game for it.

Thanks for reading my life story. I love your comments. Please stay safe and healthy and enjoy what's left of summer.
JB